Wednesday, 20 February 2013
sewing triangles
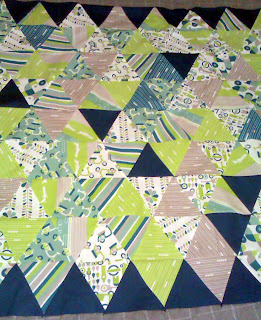
When I posted photos of Jacks' quilt, a couple of friends mentioned that they worried about sewing triangles and asked if I could do a wee tutorial. So here we are.
Jack's quilt is made up of 60 degree triangles. There are some great tutorials out there on how to cut 60 degree triangles - Faith from Fresh Lemon Quilts has a great one. I used the 60 degree line on my ruler and cut the widths to the width of my rules (6 inches) to make it a little easier.
So once they are cut, take two triangles and place them on top of each other (right sides together), sew together, using a 1/4 inch seam...
then press the seam open...
IMPORTANT: Don't trim the dog ears yet. It's not like HSTs where you trim them down at this stage. Resist the urge! Take your next triangle and place it on top of the triangle you want to join it to, lining up the corner of the single triangle with the dog ear part of the seam of the other one...
the triangles should line up the length of the side you are planning to sew. Sew together using a 1/4 inch seam and then press your seams open
the distance between the top of the middle triangle and the top of the sewn strip should be 1/4 inch. You can now trim the dog ears if you want (I didn't and it was no biggie).
I hope this helps.
Subscribe to:
Post Comments (Atom)


I have been scared to sew triangles but now I know!! Thanks for the great tutorial :)
ReplyDeleteThe strips works quite well eh :-)
ReplyDeleteGreat tutorial!
ReplyDeletePerfect!! I always misjudge that distance… This should help immensely! :-)
ReplyDeleteSomething new to try! Thank you for the tutorial :)
ReplyDeleteI've pinned this, i will do a triangle quilt at some point, and I need all the help i can get, thx for the great tutorial. : )
ReplyDelete